New Website!

Hi all,

It’s been six years since Turnspit & Table started and it’s definitely time for an update! As part of the process of revamping the blog, I’ve decided to move to a new address – www.turnspitandtable.com where you can see all of the old content as well as brand new posts. Don’t worry though, if you subscribe by email, you should still get informed about posts on the new site.

Check it out, and let me know if there are particular types of recipes that you would like me to cover!

Kim

Jane Dawson’s Jockelet (Chocolate) Cream

This week it’s time for the annual transcribathon hosted by the Early Modern Recipes Online Collective (EMROC) and for the first time Stanford is taking part. Each year, people around the world come together to transcribe a hand-written book of recipes from the early modern period. Manuscript receipt books are great to work with because they provide a really intimate look into early modern lives, especially women’s lives. Many households kept receipt books, which were handed down from generation to generation and each new owner would add their own favourite recipes for food, medicines for people and animals, and other household products like ink and soap.

IMG_8093

To celebrate the transcribathon, I wanted to make a recipe from the book we transcribed last year, Jane Dawson’s 17th century receipt book. I was intrigued by a recipe that I transcribed, called Jockelet Cream. One of the best bits of working with early modern cookbooks is figuring out the phonetic spelling that they used – jockelet becomes chocolate if you read it aloud.

Jockelet Cream Recipe

Recipe for chocolate cream from Jane Dawson’s receipt book, V.b. 14, p. 17. Licensed by Folger Shakespeare Library under CC BY-SA 4.0.

The Recipe

Jockelet Creame

boyle a pinte of Creame thicken it with an Egge yolke and mill into it two spoonfulls of the powder of Jockelet take it of as it rises to froth in to what you please[1]


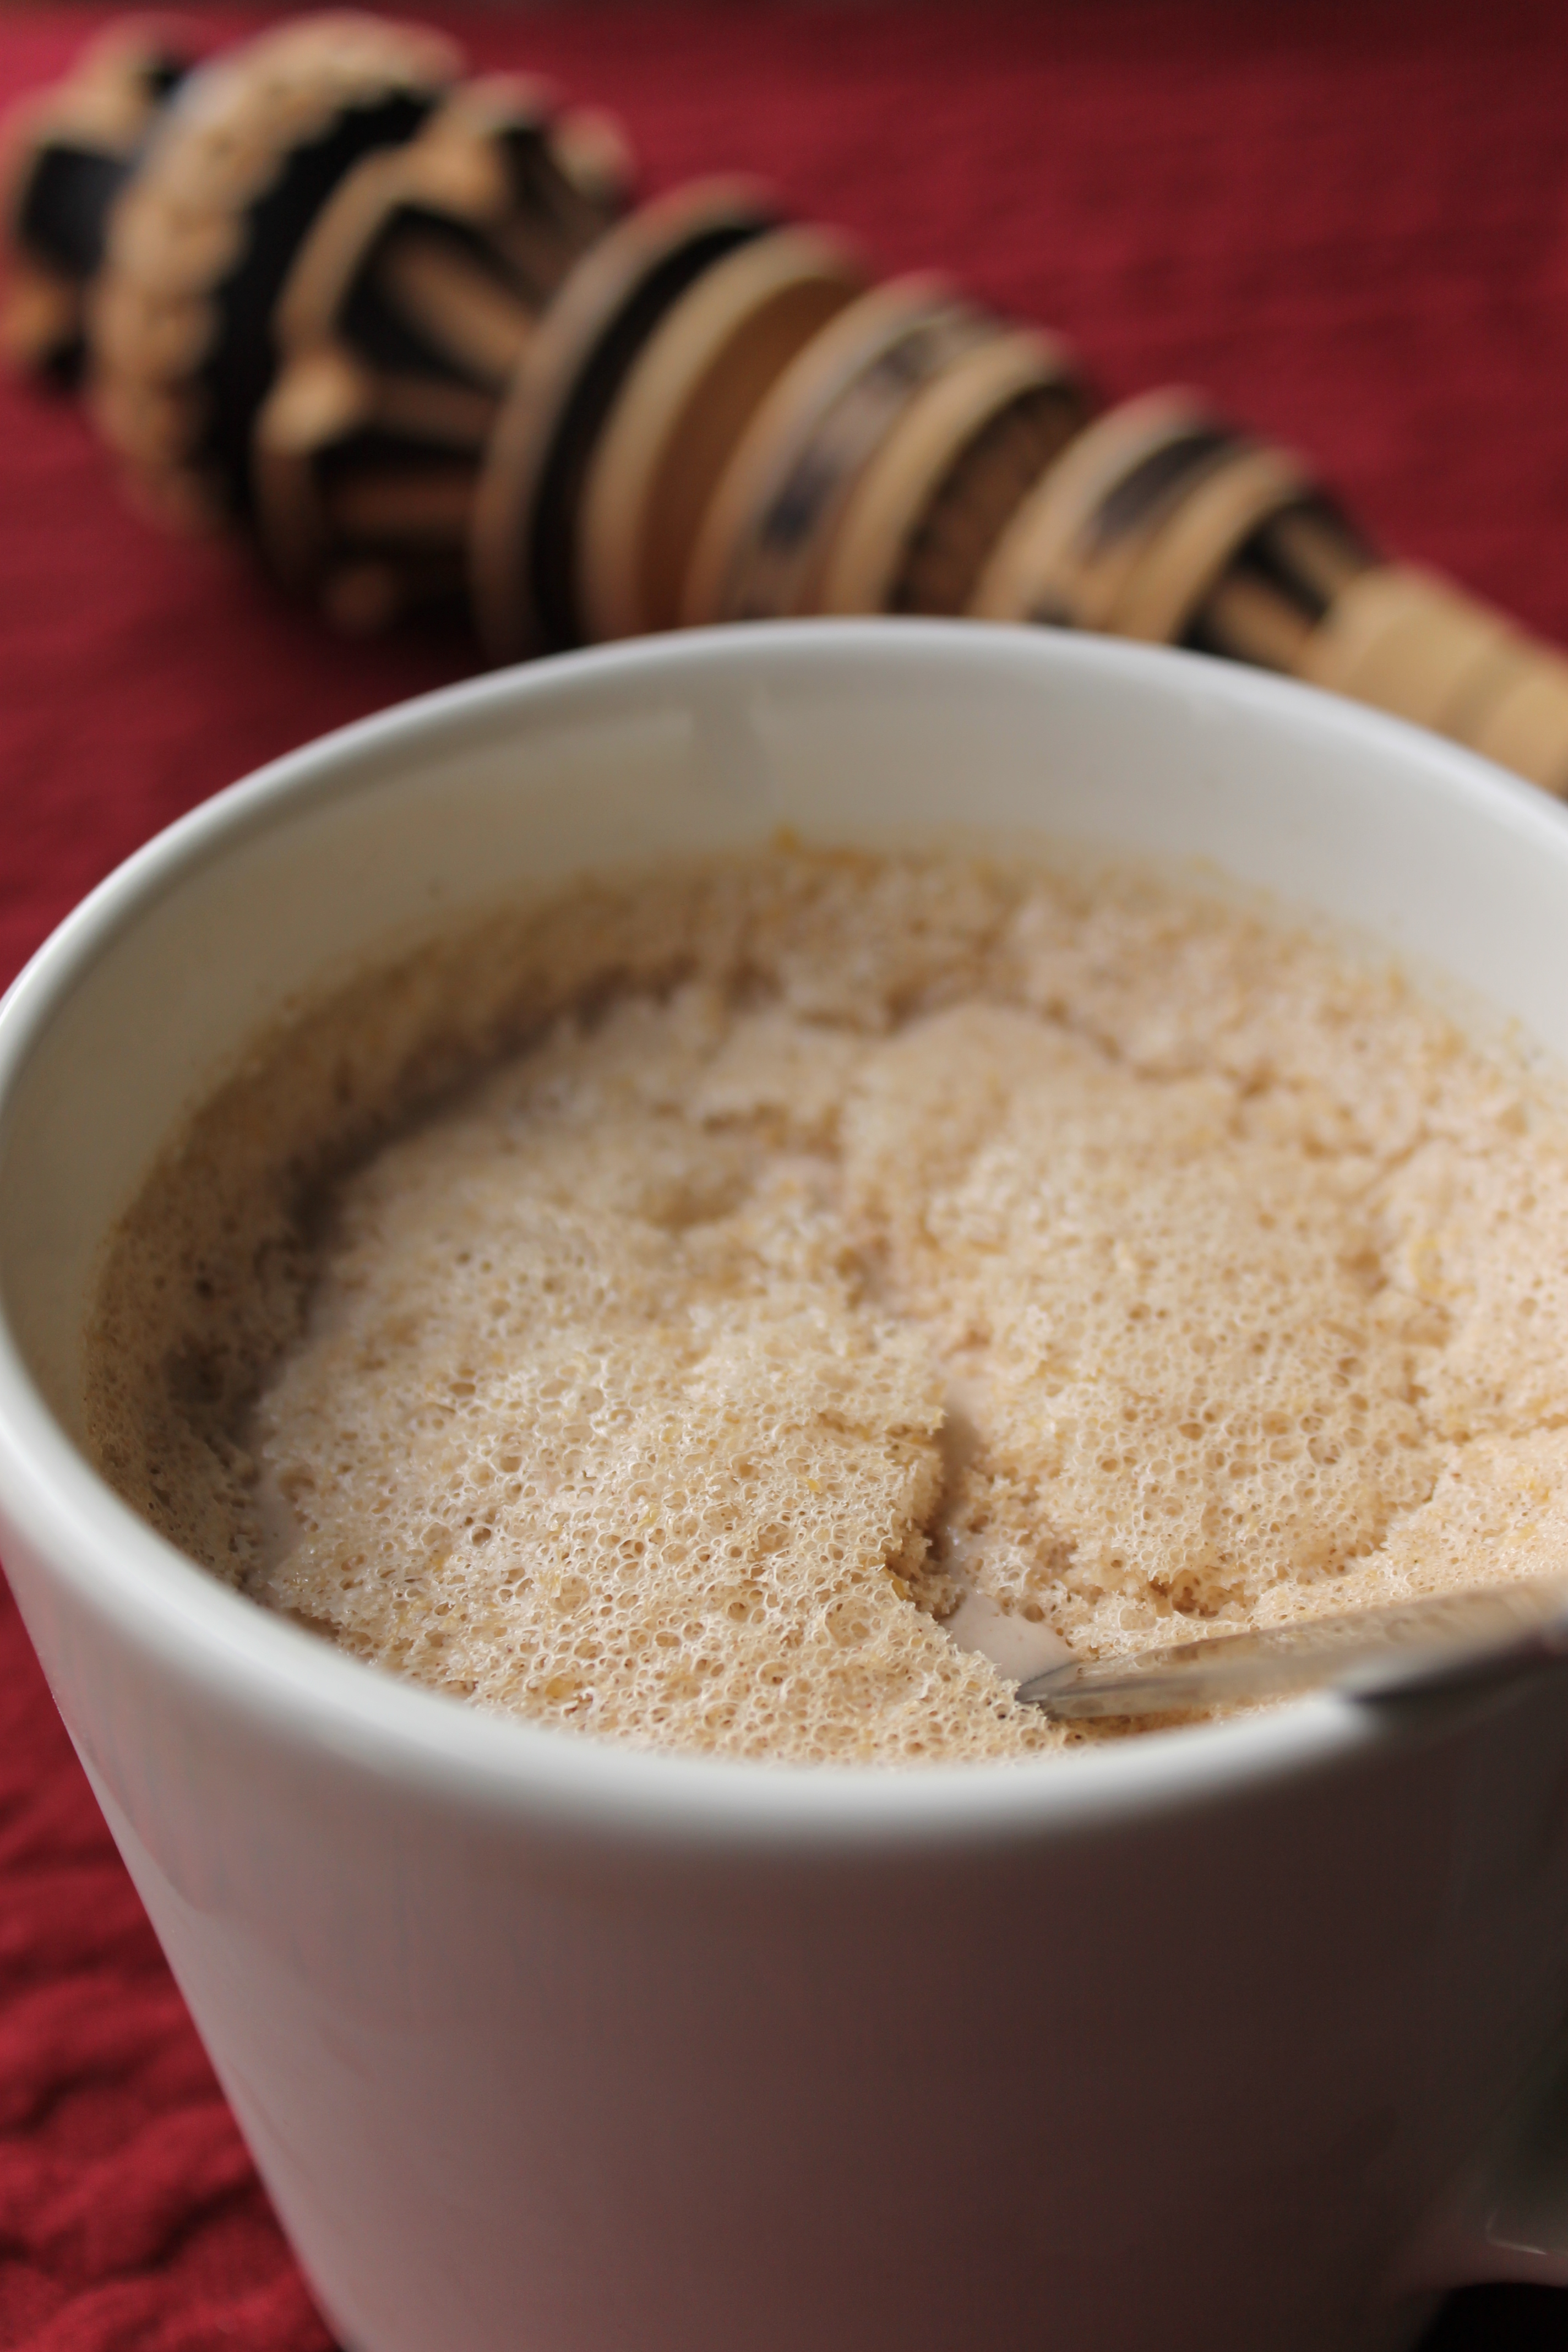
At first I thought that this was a recipe for a hot chocolate drink, and having recently acquired a Mexican molinillo, I was excited to try my hand at it. A closer look at the recipe, however, suggested that this was more like a custard, thickened with egg even though it still retained the froth typical of early European drinking chocolate recipes.

Molinillo

My new molinillo!

A search for other chocolate cream recipes turned up plenty of similar ones from the seventeenth and eighteenth century: from an anonymous Scottish manuscript, Anna Western’s receipt book, a later addition to Elinor Fettiplace’s receipt book, an early eighteenth century receipt book, Elizabeth Moxon’s cookbook (1764) and Susanna Kellet’s coobook (1780). At the same time, there were lots of other flavoured creams too; lemon and orange were very popular but Susanna Kellet for example has recipes for cinnamon, raspberry, lemon, citron, barley, almond and apple creams.


Since receipt books were generally added to over time, sometimes over a number of generations, dating them is often challenging. One recipe in Jane Dawson’s book is dated to 1693, and a late seventeenth-century date is generally consistent with the other recipes. That makes this recipe for chocolate cream relatively early – only a handful of English chocolate recipes are known from before 1700. Lady Anne Fanshawe, the wife of the Spanish ambassador, collected a recipe for drinking chocolate in 1665 and in 1668 the Earl of Sandwich recorded a number of recipes for chocolate including some of the earliest frozen dessert recipes in English.[2] Another recipe attributed to Rhoda Fairfax is probably also from before 1700, and there are two recipes in published cookbooks, one for a beverage and one for ‘Chocolet-puffs’.[3]

In 1702, François Massialot’s The Court and Country Cook (originally published in 1691 as the Cuisinier Roial et Bourgeois) became available with the earliest known recipe for chocolate cream in English.[4]  

 Chocolate-cream.

Take a Quart of Milk with a quarter of a Pound of Sugar, and boil them together for a quarter of an Hour : Then put one beaten Yolk of an Egg into the Cream, and let it have three or four Walms: Take it off from the Fire, and mix it with some Chocolate, till the Cream has assum’d its colour. Afterwards you may give it three of four Walms more upon the Fire, and, having strain’d it thro’ a Sieve, dress it as pleasure.[5]

Taza chocolate tablet

The Jane Dawson recipe is different in a few key ways: first, it doesn’t use any sugar so ends up being quite bitter when made with dark chocolate. Dawson was probably using pre-prepared chocolate tablets which were available in England from the 1650s, and they may have been already sweetened with sugar and possibly spiced as well.[6] The other major difference is that Massialot focuses on boiling the chocolate (a walm is an unknown measurement of time boiling[7]) while Dawson emphasises milling and froth. Did the extra boiling make Massialot’s recipe thicker and more custardy? It’s hard to imagine that it thickened much with only one egg yolk and twice as much cream.

Mujer_vertiendo_chocolate_-_Codex_Tudela

Woman making foamy chocolate by pouring it from one vessel to another from a height. Codex Tudela, fol. 3r, c. 1553. [Public domain] via Wikimedia Commons.

Making frothy chocolate drinks was something that the Spanish colonizers learnt in Mesoamerica where a frothy head was produced by pouring the beverage from one vessel to another from a height.[8] The Spanish later developed a type of wooden whisk called a molinillo which was rotated briskly by rubbing the handle between the palms, and this technology was taken to Europe along with chocolate itself.[9] Sometimes called a chocolate mill, these wooden whisks could be inserted into elaborate metal or ceramic chocolate pots.


800px-Bodegón_con_servicio_de_chocolate_-_Museo_del_Prado

Chocolate tablets for making drinking chocolate in the pot with a molinillo, beside a chocolate cup for drinking it out of, bread and biscuits for dipping. Still Life with Chocolate Service, Luis Egidio Melendez, 1770 [Public Domain] via Wikimedia Commons.

For such a short, easy recipe, there are a lot of unknowns when it comes to Jane Dawson’s chocolate cream. There are all the usual problems of converting measurements, and figuring out how big an early modern egg was, but there is also the question of what the chocolate she used would have been like, and what consistency the final product was supposed to be.


Different recipes, or even different interpretations of very similar recipes produce wildly different results. Marissa Nicosia over at Rare Cooking made a chocolate cream that was thick and rich, like pudding. Kathleen Wall’s recipe calls for beaten egg whites producing a lighter chocolate mousse. Amy Tigner’s students made a kind of chocolate custard which is topped with whipped cream for a layered effect. Another possibility is that the recipe is supposed to be served as a hot drink, more like a historical hot chocolate. While I can’t rule that out, other similar but more detailed recipes for chocolate cream do seem to be served cold in glasses, kind of like a mousse.

Although I used the measurements from Dawson’s recipe, I used the instructions from an anonymous Scottish manuscript from 1722 for clarification.

Chocolate Cream

Boil your Cream, & put in as much Chocolate as will colour it of a good brown Colour, & thicken it as thick as good Cream with ye yolk of an Egg well beaten; then with a Mill mill it up that the Froth may be an Inch above your Glasses or above your Cream in the Glasses. Serve this wt your Orange and Lemon Creams, and they are very gentle Creams.[10]


The instructions are very similar, but a little more detailed. This recipe suggests that the cream does not thicken very much, just to the consistency of ‘good cream’. That fits with my experience, which was that one egg yolk did not provide a lot of thickening. Again, the recipe emphasises frothiness and while I didn’t get a full inch of froth above the cream, I was able to get the froth to kind of set by putting the foam on top of the cream and letting it cool.


Overall, it produced basically what you would expect – a slightly chocolate-flavoured, very bitter, slightly thickened cream which was edible, but not my favourite. I think a little sweetening would have gone a long way, and would be keen to try making it again with a spiced chocolate with cinnamon or chili just to add a bit more interest. I would also add more chocolate, since the flavour was very subtle. It is interesting to wonder whether that is a mismatch between the quantity of Dawson’s two spoonfulls and my own, or whether perhaps she was making the most of a small amount of an expensive ingredient.

Chocolate cream made from a late seventeenth-century recipe

[1] Jane Dawson, “Cookbook of Jane Dawson” (Manuscript, 17th Century), 17, V.b. 14, Folger Shakespeare Library.

[2] Kate Loveman, “The Introduction of Chocolate into England: Retailers, Researchers, and Consumers, 1640–1730,” Journal of Social History 47, no. 1 (September 1, 2013): 27–46, https://doi.org/10.1093/jsh/sht050; Sara Pennell, “Recipes and Reception: Tracking ‘New World’ Foodstuffs in Early Modern British Culinary Texts, c. 1650-1750,” Food & History 7, no. 1 (2009): 11–34, https://doi.org/10.1484/J.FOOD.1.100633.

[3] Pennell, “Recipes and Reception: Tracking ‘New World’ Foodstuffs in Early Modern British Culinary Texts, c. 1650-1750.”

[4] Pennell, 24.

[5] François Massialot and J. K, The Court and Country Cook: Giving New and Plain Directions How to Order All Manner of Entertainments … Together with New Instructions for Confecioners … And, How to Prepare Several Sort of Liquors [by F. Massialot] … Translated Out of French Into English by J. K. (London: Printed by W. Onlye, for A. & J. Churchill, at the Black Swan in Pater-noster-row, and M. Gillyflower in Westminster-hall, 1702), 97.

[6] Loveman, “The Introduction of Chocolate into England.”

[7] Oxford English Dictionary, “‘walm, n.1’.,” n.d., https://www.oed.com/view/Entry/225353?rskey=DBFOk1&result=1&isAdvanced=false.

[8] Marcy Norton, Sacred Gifts, Profane Pleasures: A History of Tobacco and Chocolate in the Atlantic World (Ithaca, NY: Cornell University Press, 2008).

[9] Amanda Lange, “Chocolate Preparation and Serving Vessels in Early North America,” in Chocolate: History, Culture and Heritage, ed. Louis E Grivetti and Howard-Yana Shapiro (Hoboken, NJ: John Wiley and Sons, 2009), 129–42.

[10] “‘Large Collection of Choice Recipes for Cookrie, Pastries, Milks, Sauces, Candying, Confectionating, and Preserving of Fruits, Flowers, Etc’, Dated Dumfries, 1722.” (1764 1722), MS 10281, transcription and image available on https://www.nls.uk/year-of-food-and-drink/february.


The Redaction


Jane Dawson’s Chocolate Cream

473 ml (cream

1 egg yolk, beaten

2 tablespoons of dark chocolate, finely grated


  1. Place the cream in a small saucepan and bring to the boil. Add a little of the hot cream to the beaten egg yolk and whisk, then return the mixture to the saucepan and whisk into the rest of the hot cream. Heat gently until it thickens slightly.
  2. Dissolve the grated chocolate into the hot cream, and whisk well to form the froth. Pour the liquid into your glasses or moulds, and top with the froth. Carefully move to the refrigerator and allow to cool.

IMG_8101

Carolina Snowballs Re-do

Carolina Snowballs, recipe from 1858

Way back in 2015 I made a late nineteenth century recipe for Peach Snowballs from Mina Lawson’s The Antipodean Cookery Book. Even though the peaches tasted great, the rice didn’t form a homogeneous layer the way that it is supposed to (for good examples see Savoring the Past and World Turn’d Upside Down).

Peach Snowballs, recipe from 1895

Not very successful peach snowballs

These snowballs are sometimes called Carolina Snowballs, because they were made with Carolina gold rice, grown in Carolina and Georgia. This kind of rice is no longer widely available, but in recent years has been resurrected by the Carolina Gold Rice Foundation (and sold by Anson Mills) so I’ve been meaning to try this recipe again using the proper type of rice.


The story of Carolina Gold is well beyond the scope of this blog post (a good place to start is Karen Hess’ The Carolina Rice Kitchen: The African Connection) but it is impossible to write about this rice without acknowledging its deep entanglements with slavery (for which see Michael Twitty’s The Cooking Gene).


By at least 1690, rice was being raised in South Carolina and plantation owners made their fortunes by exploiting the experience that enslaved West African workers had of growing rice.[i] West African men brought expertise in constructing complex irrigation systems to control the level of water in the rice fields. The knowledge of how to grow the rice, as well as how to make and use the equipment necessary for processing came from the women who had traditionally cultivated and prepared the rice in West Africa.


Wet rice cultivation, as practiced in South Carolina and Georgia, was extremely profitable at the expense of enslaved workers’ health. Conducted knee-deep in murky water under an unrelenting sun, the work itself was exhausting, dangerous and never-ending. The water harbored a host of threats including snakes, alligators, parasites and biting insects which spread diseases like malaria.[ii] As Jennifer Morgan points out “Rice is among the most onerous and labor intensive food crops, and the duration of the growing season and the dangerous and repellent nature of the work placed it at the extreme end of any continuum of forced agricultural labor in the early Atlantic world.”[iii]

African style rice pounder

African style rice pounder at the Whitney Plantation in Louisiana

As in Western Africa, rice came to play a central role in the diet of the South, from the homes of the labourers themselves to the wealthiest tables where it was cooked, of course, by enslaved African cooks and African American domestic servants. The complex cuisine that resulted was a combination of West African and European traditions, creating a distinct style of rice cookery. As historian Michael Twitty enumerates, this includes:

“chicken pilau, breads, puddings, rice cakes, crab fried rice—rice as the necessary accompaniment to barbecue hash, okra soup, crawfish étoufée, and red beans, as they had in Saint-Domingue/Haiti—and sugar and rice for a quick breakfast; all come down to us through the centuries as legacies of this heritage. So also have soups made with peanuts or peanuts and oysters, benne (sesame seed) and hot-pepper sauces, crab gumbos, and a battery of food with which the only acceptable accompaniment is rice cooked perfectly, with every grain steamed, separate and distinct.”[iv]


One of the maybe surprising results of this cuisine in the Carolina snowball. Possibly descended from the French bourdelot , an apple wrapped in pastry and boiled or baked, the snowball is an apple (or more rarely another type of fruit) wrapped in rice and boiled in a pudding cloth.[v]


What is really surprising is the longevity of this recipe; Hess quotes a recipe from The Lucayos Cook Book which might date back to as early as 1690, although the provenance of this manuscript isn’t great and it is unclear where the original is.[vi] At the very least, a recipe for Carolina Snow Balls in the eighth edition of Hannah Glasse’s The Art of Cookery published in 1763, and similar recipes continued to be published well into the 1920s.[vii]


Probably the reason for this extraordinary perseverance is that this recipe is about as cheap and easy a dessert as you can make. While rice was an expensive and exotic product in the medieval period, it became considerably more available in the Early Modern period – exports from South Carolina alone increased from 10,407 pounds in 1698 to more than 72 million pounds in 1774.[viii]


As the price of rice dropped, this kind of dessert became much more achievable for middle class consumers (such as Glasse’s readers). The short list of ingredients, the simplicity of the method, limited equipment required, and the hot, filling result would all have appealed to housewives and cooks needing a sweet dish.


[i] Henry C. Dethloff, “The Colonial Rice Trade,” Agricultural History 56, no. 1 (1982): 232.

[ii] Michael W. Twitty, The Cooking Gene: A Journey Through African American Culinary History in the Old South (New York, NY: Amistad, 2017), 240.

[iii] Laboring Women: Reproduction and Gender in New World Slavery (Philadelphia: University of Philadelphia Press, 2004), 162.

[iv] Twitty, The Cooking Gene, 262.

[v] Karen Hess, The Carolina Rice Kitchen: The African Connection (Columbia, S.C.: University of South Carolina Press, 1998), 146.

[vi] Hess, 144–45.

[vii] Hannah Glasse, The Art of Cookery, Made Plain and Easy; Which Far Exceeds Any Thing of the Kind yet Published … To Which Are Added, by Way of Appendix, One Hundred and Fifty New and Useful Receipts, and a Copious Index, 8th ed. (London: Printed for A. Millar [and others], 1763), http://archive.org/details/b30502500.

[viii] Dethloff, “The Colonial Rice Trade,” 234.


The Recipe

Capture

The version I’m following is from The Housekeeper and Gardener (1858) by Rebecca Upton. This is one recipe were it does really make a difference to have the right type of rice. On his blog, Kevin Carter suggests that medium grain rice is best but the Carolina Gold, which is a long grain rice, worked well for me (but other long grain rice did not). Make sure, if buying Carolina Gold that you buy the variety called Carolina Gold and not the brand Carolina Rice produced by Riviana Foods.


The recipe calls for two spoonfuls of rice, but how much is that? Two tbsp didn’t feel like enough to me, but I think that the 100 g I put in was maybe a little too much (James Townsend suggests ½ cup or about 115 g). The trickier bit is getting the rice evenly distributed, and smaller apples might help here.

IMG_8111

The Redaction

Carolina Snowballs


Per Snowball

1 large apple

Orange and lemon (approx. ¼ peel of 1 orange and 1 lemon) finely chopped peel, or grated zest

80-100 g Carolina gold rice


For Sauce (for 1-2 apples)

55 g butter

30 ml white wine

1 ½ tbsp sugar

Pinch of ground cinnamon

Pinch of ground nutmeg


  1. Core the apple(s). Place a clean pudding cloth in a bowl, with the cloth hanging over the edges of the bowl.Put a spoonful of the rice in the bottom of the cloth, then place the apple on top. Put the citrus peel inside the hole left by coring the apple(s). 2. Add the rest of the rice around the apple, then gather the corners of the cloth and tie the pudding up. Leave a little room for the rice to expand, but not too much so it doesn’t get soggy. The actual knot should be tight. Massage the rice around the apple so that it is spread evenly.
  2. Place the pudding in a saucepan of cold water and bring to the boil. Simmer for 1 hour.
  3. Meanwhile, make the sauce by melting the butter in a small saucepan. Add the remaining ingredients and heat until the sugar is dissolved.
  4. When the pudding is done, carefully remove it from the saucepan and dip it in cold water for a few seconds. Place the pudding in a bowl, cut off the string and carefully unwrap it. It may help to place another bowl on top and flip it, since the base normally looks better than the tied end. Serve with warm sauce.


Two Vintage Passionfruit Recipes for Using Up a Glut

Passionfruit flummery, recipe from 1939

I spent August at home in Brisbane and our passionfruit vine was loaded down with fruit. There were so many little bulbs of deliciousness that I racked my brain trying to figure out what to do with them all. That means, of course, searching Trove for historical recipes to test.

I’m not sure it’s generally very well known that Australia has a proud baking tradition (although people overseas do comment on the Australian sweet tooth) but many of Australia’s most iconic treats are baked: lamingtons, ANZAC biscuits, gems cones, pumpkin scones, damper, even pavlova.

While many of the baked goods were variations on European traditions, such as gingerbread, sponge cakes or scones, Barbara Santich argues that what makes Australian baking unique was the proliferation of variations.[1] She suggests that sweet recipes took up a much larger proportion of 19th and early 20th century Australian cookbooks compared to contemporary English cookbooks, perhaps two or three times as many.[2]

The warm growing conditions facilitated this experimentation; sugar was cheaply available, especially as the Australian sugar business took off, and fruit was abundant. Two tropical flavours, in particular, came to the forefront: coconut and passionfruit. While passionfruit is now most commonly used as a topping for pavlova, it was also used as a filling or icing for cakes, and made into jams, jellies and butters, puddings, slices, pies, biscuits, creams and flummeries.

Passionfruit flummery, recipe from 1939

The Recipes

The first recipe I decided to make was a 1939 recipe for Passionfruit Custard Slices. The slice, a rectangular slab of baked goodness that’s cut into slices, is a highlight of Australian baking.  No country bakery is complete without vanilla slice – a thick layer of vanilla custard sandwiched between crisp, golden pastry. Passionfruit slice is a variation on this, with a passionfruit icing on top of the upper layer of pastry.

What makes this recipe different is that it doesn’t use a real custard for the filling. Instead, you make a white sauce which is then enriched with sugar and egg yolks. I was pretty wary of this, since it didn’t sound like it would be thick enough, or particularly tasty. However, because it’s not very sweet it does a really good job of balancing out the extremely sugary icing.

Passionfruit Custard Slices

INGREDIENTS: 1/2lb. Puff, rough puff or flaky pastry.

FOR CUSTARD: 1 tablespoon butter, 1 heaped tablespoon flour, 2 egg yolks, 1 cup milk, 1 or 2 passionfruit.

FOR ICING: 1/2lb. Icing sugar, 2 passionfruit.

Method: Roll prepared pastry square or oblong in shape, place on baking tray, brush surface with egg white, then cook in hot oven for 15 to 20 minutes, decreasing heat when well risen and lightly brown. Lift on wire cooler, and, when cold, split in two layers. Melt butter in saucepan, add flour and blend smoothly, cook for a minute, then add milk, and stir until mixture boils and thickens. Stir in sugar, egg yolks, and cook without reboiling the custard. Stir until cool, add passionfruit pulp or strained juice, then spread one layer of pastry with custard and cover with other layer. Mix sifted icing sugar with passionfruit pulp or strained juice, forming a smooth icing. Pour over pastry surface and when firmly set, cut into slices.[3]

Passionfruit flummery, recipe from 1939

Another staple of passionfruit desserts is the moulded jelly or pudding. A flummery is basically a jelly made with a substance such as cream or milk to make it opaque. They have a long history, dating back to at least the 17th century when it was made with oats or wheat, but have mostly disappeared now. Flummery still survives in some Australian households as ‘jelly whip’, a cheap, mousse-like dessert in which evaporated milk is whipped into nearly set jelly. This version from 1933 is even cheaper, and is dairy free, because it uses flour rather than a dairy product to make the jelly opaque.

Passionfruit Flummery

Soak 1 tablespoon gelatine in 1 cup cold water for 2 hours, then add 1 1/2 cups sugar. Mix 1 tablespoon plain flour with 1 cup cold water, the juice of 2 oranges and 1 lemon. Put all on fire together and bring to the boil, remove, and when nearly cold add the pulp of 6 passionfruit, and beat till thick and white.[4]

My flummery separated, I think maybe because the jelly wasn’t cold enough when I whipped it. It was still OK, with a layer of plain jelly on the bottom and then a layer of flummery with the texture more like marshmallow fluff or something like that. The main problem was just that the jelly was wayyyyy too sweet.

[1] Barbara Santich, Bold Palates (Kent Town: Wakefield Press, 2012), 193.

[2] Santich, 190.

[3] “PASSIONFRUIT,” The Sun, January 8, 1939.

[4] “Delicious Passionfruit Recipes,” The Northern Star, August 3, 1933.

Passionfruit custard slice, recipe from 1933

The Redactions

Passionfruit Custard Slice

225g puff, rough puff or flaky pastry

2 eggs, separated

1 tablespoon butter

1 heaped tablespoon flour

1 cup milk

2 passionfruit

For the icing:

225g icing sugar

2 passionfruit


  1. Heat the oven to 190°C. Roll the pastry into a square or oblong, place on baking tray and brush the surface with the beaten egg white.
  2. Bake for 15 to 20 minutes, decreasing heat when well risen and lightly brown. Place on a wire rack to cool and, when cold, cut in half to make two layers.
  3. Melt the butter in a saucepan, add the flour and whisk to blend. Cook for a minute, then add the milk bit by bit, and stir until the mixture boils and thickens.
  4. Stir in the sugar and egg yolks, and cook without boiling the custard. Stir until it is cool then add the pulp of two passionfruit.
  5. Spread the custard on one layer of pastry, and add place the second layer of pastry on top.
  6. To make the icing, mix the sifted icing sugar with the pulp from the remaining two passionfruit to make a smooth icing. Pour over the pastry surface. Refrigerate until it sets then cut into slices.


Passionfruit Flummery

1 tbsp gelatine

2 cups cold water

1 ½ cups sugar

1 tbsp plain flour

2 oranges, juiced

1 lemon, juiced

6 passionfruit


  1. Dissolve the gelatine in 1 cup of the water, then add the sugar.
  2. Mix the flour with the remaining cup of cold water and the orange and lemon juice.
  3. Mix the gelatine and the juice mixture together in a saucepan, and bring to the boil. Remove the mixture and allow to cool.  When nearly cold add the passionfruit pulp and beat it until it is thick and white.


Passionfruit flummery, recipe from 1939

References

“Delicious Passionfruit Recipes.” The Northern Star. August 3, 1933.

“PASSIONFRUIT.” The Sun. January 8, 1939.

Santich, Barbara. Bold Palates. Kent Town: Wakefield Press, 2012.


Soyer’s Oxtail Soup


Alexis Soyer

Alexis Soyer, frontispiece engraving from A Shilling Cookery for the People, 1855, public domain.

A few years ago, I read Relish: The Extraordinary Life of Alexis Soyer, Victorian Celebrity Chef by Ruth Cowen, and now Alexis Soyer seems to pop up everywhere I turn. He was an amazing man, one of the first celebrity chefs (complete with his own line of cookbooks and product endorsements) but also an inventor and entrepreneur. Although in his restaurant he mostly cooked for the wealthy and famous he was also involved in philanthropic projects including setting up soup kitchens in Ireland during the Great Famine and working with Florence Nightingale to reform army cooking during the Crimean War.

Soyer's Kitchen at Scutari Barracks

Alexis Soyer’s Barrack Hospital kitchens in Scutari, Turkey during the Crimean War. Wood engraving. Licensed by the Wellcome Collection under CC BY.

Soyer also produced several cookbooks with recipes for cheap, simple and nutritious recipes that poor people could make at home, or that charities or institutions could make in bulk. These included Soyer’s Charitable Cookery; Or, the Poor Man’s Regenerator Dedicated to the Benevolent, for the Benefit of the Labouring, and Poor Classes of the United Kingdom (c.1847) and A Shilling Cookery for the People: Embracing an Entirely New System of Plain Cookery and Domestic Economy (1855). While the tone of his writing is self-aggrandising and patronising, Soyer evidently put a great deal of effort into the recipes and considered the equipment that people had, the ingredients they could afford, and their experience with cooking.

The Recipe

The first chapter in the A Shilling Cookery for the People contains 37 recipes for soups, stocks and gravies ranging from the extremely simple rice soup (rice boiled in broth) to the aspirational ‘Good White Mock Turtle Soup’. Needing only a heat source and a pot, these soups were adaptable to both older styles of fireplace cookery and the modern stoves. The recipe that I decided to make ‘Ox Tail Soup in Baking Pan’ would have required an oven, but there is another very similar version available for making it on the stove.

Ox Tail Soup in Baking Pan – Divide two ox tails, wash them well in cold water, then put them in the pan, with three teaspoonfuls of salt, one of pepper, four cloves, a little thyme, if handy, two good onions; add three quarts of water, two tablespoons of colouring; put on the cover, place it in a moderate oven for three hours to simmer, take off the fat, which save for use, and serve. Half a pound of any vegetable, mixed or not, cut in dice, can be added with advantage.[1]

The recipe for colouring is given later in the book:

A Common Batter – Put in a basin six good tablespoonfuls of flour, which dilute very slowly with one pint of milk, add one spoonful of salt, quarter that of pepper, beat an egg well in it, if used for toad-in-the-hole. A little parsley, chopped onions, or a little spice, makes an agreeable change; it will also make nice puddings, if baked alone, or under a joint in a well-greased tin.[2]

This recipe is pretty straightforward. The oxtails I bought were already cut up but if you’re buying a whole oxtail then ask your butcher to section it for you or you can do it yourself by cutting in between the caudal vertebrae (The Seasoned Cook has a video of how to do this). The benefit of using oxtail is that it’s very cheap, and it tastes delicious if you give it a long, slow cooking. Once your oxtails are ready, just stick everything in a lidded casserole dish, or a baking dish covered with foil and let it simmer for three hours. For the vegetables, I used leek, turnips and carrots but you could also use potatoes, pumpkin, peas, swedes, parsnips or celery.

[1] Soyer, A Shilling Cookery for the People, 16.

[2] Soyer, 164.


Oxtail Soup made from Alexis Soyer's 1855 recipe

The Redaction

Baked Oxtail Soup

1 tbsp flour

1/6 cup milk

Parsley, chopped (optional)

2 oxtails, sectioned

Thyme

3 tsp salt, plus additional for paste

1 tsp pepper, plus additional for paste

4 cloves

1 onion, chopped

1 leek, chopped

2 turnips, diced

2 small carrots, diced

3 litres water

  1. Preheat the oven to 180°C. Whisk together the flour, milk, and parsley (if using) until it forms as smooth paste and season with the additional salt and pepper.
  2. Place all of the other ingredients in a casserole dish or a baking tray. Stir in the flour and milk paste. Cover with a lid, or with aluminium foil.
  3. Put the dish in the oven and leave to simmer for 3 hours. Skim off any excess fat. Serve hot with crusty bread or buttered toast.

Oxtail Soup made from Alexis Soyer's 1855 recipe

References

Cowen, Ruth. Relish: The Extraordinary Life of Alexis Soyer, Victorian Celebrity Chef. London: Phoenix, 2008.

Soyer, Alexis. The Gastronomic Regenerator: A Simplified and Entirely New System of Cookery; with Nearly Two Thousand Practical Receipts, Suited to the Income of All Classes. London: Simpkin, Marshall, & Company, 1846.

Soyer, Alexis. Soyer’s Charitable Cookery; or, The Poor Man’s Regenerator. 1847. Reprint, London: Simpkin Marshall & Company, 1884.

Soyer, Alexis. A Shilling Cookery for the People: Embracing an Entirely New System of Plain Cookery

and Domestic Economy. London: G. Routledge & Company, 1855.


Making Chicha Part 2 – Experimental Chicha, Two Ways

This is the second part of a two-part series on using archaeology to study alcohol production. To read the first part, click here.

In Central and South America today, the word chicha is used for a range of fermented and unfermented beverages; most commonly it refers to maize beer, but chicha can also be made from other grains, tubers and fruits. Archaeological evidence of chicha has been found at many sites in Peru, and has also been suggested for sites in Argentina, Mexico and Bolivia.

Wari wooden beaker (kero), 7th to 10th century, from Peru or Bolivia. These cups were used for drinking chicha. Accession No. 1978.412.214. Licenced by the Metropolitan Museum under CC0 1.0 Universal.

Wari wooden beaker (kero), 7th to 10th century, from Peru or Bolivia. These cups were used for drinking chicha. Accession No. 1978.412.214. Licenced by the Metropolitan Museum under CC0 1.0 Universal.

There are two main ways in which chicha is produced today: either the corn is either germinated and ground, or it is soaked and then chewed. In either approach, the idea is to use enzymes to start breaking down the starches into sugars for fermentation. If you germinate the corn, the enzymes are produced naturally and if you chew the grain, the enzymes are introduced from your saliva.

Purple corn for making chicha.

Purple corn for making chicha.

I started the experiment with some really beautiful purple corn which I soaked for 24 hours and then spread out on damp paper towel to start germination. Unfortunately, after seven days there were no signs of germination. I decided to try the mastication method with this corn instead, and so I mixed it with a little water and chewed it. Once the grain was chewed, I spat it out and formed little clumps of muko which I left to dry. Once again, however, my chicha making was foiled because the muko went mouldy.

Muko, clumps of chewed up corn for making chicha.

Muko, clumps of chewed up corn for making chicha.

With two failures under my belt, I turned once again to the germination method. This time, the corn that I used had already been malted (soaked and germinated) and roughly crushed. I ground the corn more finely with a rolling pin to produced a mixture of small and medium-sized pieces and a powder.

IMG_6410

Grinding the corn for the second attempt at making chicha.

Once all the corn was ground, the corn was placed in a saucepan and covered with hot water. I put a lid on the saucepan and left it to soak for an hour. After the hour had passed, the corn smelled wonderful, very sweet and malty. I added more water to fill the saucepan and brought the mixture to the boil before lowering the temperature and letting it simmer for an hour.

Bubbles show that the chicha is fermenting nicely!

Bubbles show that the chicha is fermenting nicely! There is no yeast added to the mix, but wild yeasts from the skin of the corn and from the air are used to ferment the mixture. Yeast can also be added by adding some older chicha, or by using equipment which has been inoculated with yeast.

Once the chicha was cool I transferred the liquid and half of the corn to a plastic container. The lid was left on loosely, and the chicha left to ferment. After three days, the chicha was bubbling and smelled sweet and tasted like watery corn.

The final product, which tasted like watery corn.

The final product, which tasted like watery corn.

Throughout the process, I took samples of the corn which can now be compared against archaeological samples. Hopefully having comparative samples like this will allow archaeologists to identify chicha production and consumption from residues found in different vessels.


Making Chicha Part 1 – Alcohol and Archaeology

This is the first of two posts on using experimental archaeology to study alcohol production in the past. In this post, I’m going to talk about why archaeologists study ancient brewing and one of the ways that archaeologists identify alcohol on sites in the past. The next post will look at an experimental reproduction of chicha, a type of corn beer, which is used to create comparative material for starch analysis.

IMG_20171021_105210213

Egyptian model of a brewery. The men on the left are mashing starter while the seated man is bottling the beer. Middle Kingdom, RC 483, Rosicrucian Egyptian Museum. Photo by the author.

In the past few decades, archaeologists have started to pay a lot more attention to alcoholic beverages such as wine and beer. In part, this is because we now have much better techniques for recovering and analysing even very small samples of residues from the inside of brewing containers. At the same time, archaeologists have also started to realise that alcohol plays important social roles and studying the production and consumption of alcoholic beverages can help us answer much bigger questions about state formation, social stratification, gender roles and the domestication of plants.

Traditionally, alcoholic drinks have been studied as part of historical diets mostly as an important source of calories, nutrients and water. Even though that is definitely the case, consumption is always about more than just survival; as Dietler says, “People do not ingest calories, or protein: rather, they eat food, a form of material culture subject to almost unlimited possibilities for variation …”.[1] Which foods we consider edible, what we think of as a complete meal, how we know when and where is appropriate to eat, and the order of foods in the meal all depend on your culture and social position.

Wine press in Shivta, Israel. The remains of processing facilities like this are one of the clearest signs of alcohol production at a site,  but normally archeologists have to combine different types of evidence to make a convincing argument. צילום:ד”ר אבישי טייכר [CC BY 2.5 (http://creativecommons.org/licenses/by/2.5)%5D, via Wikimedia Commons

Foods are particularly loaded with symbolism because they literally become part of us when we eat them. As such, they help us construct individual and group identities. As an example, just think about how different coffee orders signal different identities. Asking for a coffee in a diner is different from ordering a vanilla soy latte in a keep cup at Starbucks which is different from ordering a single-origin cold brew in a hipster cafe, and each order helps to signal membership in a different group identity.

Brian Hayden has argued that through providing feasts, some people were able to control access to alcohol and so to leverage the group identity that was created by sharing it for political purposes.[2] He suggests that having extra grain at the end of the season allowed some individuals to make alcohol which could then be used to through feasts. When you throw a feast, the people who are invited are then obliged to give something back, either by inviting you to their own feast, or by providing labour or goods in return. This creates distinct classes of people, those who can afford to throw feasts and those who cannot. Different would-be leaders would compete to throw the best feasts, and to control the largest amount of labour (for large building projects like city walls, palaces etc.) or tribute in goods.

An example of a standard Late Uruk bowl from Mesopotamia. It has been suggested that these bowls, which are ubiquitous in this period, were used to distribute rations of grain or perhaps bread. VA 15455 from the Staatliche Museen zu Berlin.

An example of a standard Late Uruk bowl (VA 15455) from Mesopotamia. It has been suggested that these bowls, which are ubiquitous in this period, were used to distribute rations of grain or perhaps bread. Licenced by the Staatliche Museen zu Berlin under CC BY-NC-SA 3.0 DE.

In other cases, the state produced and distributed alcohol as part of workers’ rations. Because food and drink are so essential to everyday life, controlling access to food and drink is a very effective form of social control.[3] Intensified state control of beer production has been identified in a number of ancient states including Mesopotamia, Egypt and Peru, and would have been a useful tool in centralising state power.[4]

Since alcohol clearly played an important role in ancient societies, it is important that archaeologists study it. However, recognising alcohol brewing and consumption on archaeological sites can be very difficult. For the most part, archaeologists rely on finding multiple lines of evidence, including equipment or installations for brewing, residue analysis, and plant remains. Finding just one of these elements, such as plant remains, might be evidence of lots of different practices but if we can find multiple types of evidence then that makes it more likely that people really were brewing or drinking alcohol there.

One of the ways that we can potentially identify brewing is through starch analysis. Starch grains are often left on tools and equipment that are used for preparing and serving plant-based foods and beverages, including alcohol. Starch analysis can be used to identify the type of grains, rhizomes or tubers that are present and sometimes even how they were prepared. Cooking, for example, causes the grains to burst and swell in distinctive ways although unfortunately, cooking also makes it harder to identify the type of grain!

Incan urpus or storage jar, 15th to 16th century, Met Museum

Incan urpus or storage jar, 15th to 16th century. These jars were used for making, storing, and transporting chicha, among other things. Accession No. 1978.412.68. Licenced by the Metropolitan Museum under CC0 1.0 Universal.

In order to identify the starch grains and the preparation techniques used, it is important for archaeologists to have comparative samples which show what different grains look like, and how different preparation techniques (such as soaking, grinding, chewing, baking, boiling etc.) affect them. In the second post of this series, I’m going to walk you through how I made an experimental batch of chicha to make comparative samples.

[1] Dietler, “Food, Identity, and Colonialism,” 222.

[2] Hayden, “Feasting in Prehistoric and Traditional Societies.”

[3] Pollock, “Feasts, Funerals, and Fast Food in Early Mesopotamian States,” 18.

[4] Hastorf, “Gender, Space, and Food in Prehistory”; Jennings, “A Glass for the Gods and Gift to My Neighbor: The Importance of Alcohol in the Pre-Columbian Andes”; Joffe, “Alcohol and Social Complexity in Ancient Western Asia”; Pollock, “Feasts, Funerals, and Fast Food in Early Mesopotamian States.”

References

Dietler, Michael. “Food, Identity, and Colonialism.” In The Archaeology of Food and Identity, edited by Katheryn C Twiss, Occasional Paper No. 34., 218–42. Carbondale: Center for Archaeological Investigations, Southern Illinois University, 2007.

Hastorf, Christine A. “Gender, Space, and Food in Prehistory.” In Engendering Archaeology, edited by Joan M Gero and Margaret W Conkey, 132–59. Cambridge: Blackwell Publishing Ltd, 1991.

Hayden, Brian. “Feasting in Prehistoric and Traditional Societies.” In Food and the Status Quest: An Interdisciplinary Perspective, edited by Polly Wiessner and Wulf Schiefenhovel, 127–47. Providence: Oxford University Press, 1996.

Jennings, Justin. “A Glass for the Gods and Gift to My Neighbor: The Importance of Alcohol in the Pre-Columbian Andes.” In Alcohol in Latin America: A Social and Cultural History, edited by Gretchen Kristine Pierce and Áurea Toxqui, 25–45. Tucson: The University of Arizona Press, 2014.

Joffe, Alexander H. “Alcohol and Social Complexity in Ancient Western Asia.” Current Anthropology 39, no. 3 (June 1, 1998): 297–322. https://doi.org/10.1086/204736.

Pollock, Susan. “Feasts, Funerals, and Fast Food in Early Mesopotamian States.” In The Archaeology and Politics of Food and Feasting in Early States and Empires, 17–38. Springer, Boston, MA, 2003. https://doi.org/10.1007/978-0-306-48246-5_2.


A Recipe for Ginger Beer, or How to Paint Your Ceiling with Alcoholic Beverages

Ginger Beer, brewed from a recipe from 1861

Since I’ve got a bit more time on my hands at the moment, I’ve been busy doing some sewing and trying to get as many unfinished projects done as I can. While I sew, I like to watch something that I’ve seen before so that I can still concentrate on whatever I’m working on.

So there I am, watching ‘Victorian Farm’ and sewing away. It’s the height of the Brisbane summer, so it’s hot and humid. Then suddenly, Peter is making homemade ginger beer and they all drink it and look so cool and refreshed. And so, of course, I had to try making some.

The Recipe

Capture

The recipe for ginger beer that I used from Philp, The Family Save-All, 167.

The recipe comes from ‘The Family Save-All’ which is a mid-nineteenth century cookbook all about using up left-overs and cheap ingredients. I’ve used it before, when I was making potato pudding and it’s a great source for cheap, everyday recipes.

The recipe would make an enormous amount of ginger beer, so even though the recipe warns that making a smaller quantity might make an inferior product, I reduced all the ingredients significantly.

Overall, it produced a very fizzy but quite pleasant ginger beer. I would have preferred a stronger ginger flavour and slightly less sugar but it was very refreshing.In the end, I didn’t measure how alcoholic it was, but do be careful because it certainly gave me a bit of a buzz.

The other thing to watch out for is the level of carbonation. If you bottle it after only four days, it will continue to ferment in the bottles. It’s really important that you put it into plastic bottles and that they get refrigerated. Otherwise, you’ll end up like me with ginger beer exploding all over the ceiling!

Ginger Beer, brewed from a recipe from 1861

The Redaction

Ginger Beer

45g ginger
4.85l water
650g sugar
Juice of 1 large lemon
1 tbsp honey
2g lemon essence
1 sachet ginger beer or beer yeast, dissolved in a little water that has been boiled and cooled

1. Sterilise all your equipment. Cut the ginger into chunks, put it in a bag and bruise with a rolling bin.
2. Place the ginger in a large saucepan and add 850ml of the water. Bring it to the boil, and simmer for 30 minutes.
3. Stir the sugar, the lemon juice, and the honey into the hot ginger water, then add the remaining water. Bring to the boil, then strain out the ginger and pour into a 1 gallon demijohn. Allow the mixture to cool until it is just lukewarm.
4. Stir in the lemon essence and the yeast. Set up the airlock and allow to ferment for 4 days.
5. On the fifth day, sterilise your bottles, lids and siphoning equipment. Siphon the ginger beer into plastic bottles, while trying not to disturb the yeast residue. Don’t fill the bottles completely, but leave some space at the top. Press out the air from this space, then cap. As the ginger beer continues to ferment, the bottle will expand. Once the bottles are expanded and hard, you must refrigerate them to keep them from exploding.
Note: This recipe isn’t written for beginner brewers. If you haven’t brewed before, then you should consult a basic guide for how to set up your equipment, do the siphoning etc. This guide is for mead, but I really like how intuitive it is, and it covers a lot of the skills you’ll need.

The Round-Up

The Recipe: Ginger Beer (available here)

The Date: 1861

How did you make it? See above.

Time to complete?: 5 days

How successful was it?: Other than the one bottle that exploded, it was pretty good. As I said, the ginger flavour wasn’t particularly strong and I don’t know if that was the result of reducing the quantities, or if it just wasn’t very strong to begin with.

How accurate?: The big change that I made was omitting the egg white. It was just going to be too difficult to add 1/14 of an egg white. I imagine that the main purpose of the egg white is to help clarify the ginger beer, so  I think that it would make more of a difference to the way it looks rather than the taste. The other big difference is the type of yeast that I used, and the way that it was introduced. The recipe didn’t specify, but it was probably a liquid yeast taken from the sludge left from beer brewing, rather than a modern dried yeast.

Ginger Beer, brewed from a recipe from 1861

References

Philp, Robert Kemp. The Family Save-All, a System of Secondary Cookery. Second. London: W. Kent and co., 1861.

A Plum Tart for Christmastide


img_5626It’s quite amazing, how regularly historical recipes will prove you wrong. So often I think that a recipe will just never work, and it’s so tempting to “fix” it by using modern techniques. Once again, however, this 17th century recipe for a Christmas plum tart shows what great results you can get by following the instructions as they are.

This recipe comes from Folger MS v.a.21, fol.146 and was posted on the Shakespeare’s World blog. If you aren’t aware of Shakespeare’s World, you should definitely check it out. It’s a crowd-sourced project which lets you help transcribe recipes and letters from the 16th and 17th centuries.  I think it’s a wonderful example of the digital humanities in action, and that they’ve had so much interest is really great news for future projects. My one beef is that the transcribed pages are not yet available to the public (although this is apparently in the works).

But back to the tart. Folger MS V.a.21 is an anonymous receipt book dated to about 1675, containing both medical and cooking recipes as was common in the 17th century.[1] Although the recipe is called ‘A receipte for damsons to bake at Christmastide or anie other plum’ it’s actually a recipe for preserving damsons or other types of plums, and then rough directions are appended for turning the preserves into a tart. The preserves would be lovely in any number of sweets. Don’t throw out the syrup either! It’s great for making mocktails with some soda water, or add some gin or vodka for a refreshing cocktail.

The Recipe

recipe

Plum Tart Recipe from Folger MS V.a.21, fol. 146. Licensed by Folger Shakespeare Library under CC BY-SA 4.0. 

Take 3 pound of damsons & a lof sugar a pint of water put that sugar & that water into a preserving skillett when it boyleth skimm it cleane Let it a cooling then slit the skin of the damsons put them into the Sirrop let them stand on the fire a stewing 2 howres together then take them vp & let them stand by till the next day then doe as before 2 howres till the last of [quarter of] an howre then let it boyle & when they are cold put them vp into gully pottes for that use this will keep till Christmastide masse when you use them to put them into the Tart made as thin as you can raise it because it must not be much baked put more Sugar into them when you bake them.[2]

I was quite surprised that the plums were put into the syrup whole and with their stones still in. It was tempting to remove the pits, but it’s actually much more efficient to just slit the skins and let them boil. After a while, the plums naturally break into halves and the pits can be cleanly lifted out. This method means that there is very little wastage of the fruit. If you were cooking with the smaller, more fiddly damsons then it would make even more sense.

low-quality

The instructions about how to make the tart are very brief, so I used the recipe for ‘Short and Crisp Crust for Tarts and Pyes’ from The Closet of Sir Kenelm Digby which is a basic hot water pastry.

SHORT AND CRISP CRUST FOR TARTS AND PYES

To half a peck of fine flower, take a pound and half of Butter, in this manner. Put your Butter with at least three quarts of cold water (it imports not how much or how little the water is) into a little kettle to melt, and boil gently: as soon as it is melted, scum off the Butter with a ladle, pouring it by ladlefuls (one a little after another, as you knead it with the flower) to some of the flower (which you take not all at once, that you may the better discern, how much Liquor is needful) and work it very well into Paste. When all your butter is kneaded, with as much of the flower, as serves to make paste of a fitting consistence, take of the water that the Butter was melted in, so much as to make the rest of the flower into Paste of due consistence; then joyn it to the Paste made with Butter, and work them both very well together, of this make your covers and coffins thin. If you are to make more paste for more Tarts or Pyes, the water that hath already served, will serve again better then fresh.[3]

It wasn’t clear to me if the tart was supposed to be self-supporting, or if it would have been in a tin. With hot water pastry you could probably make it self-supporting, but because I wanted the pastry to be as thin as possible that was going to be difficult. Robert May often refers to pies or tarts being cooked in patty-pans or dishes in The Accomplisht Cook (1671), so it seemed reasonable to use a pie tin.

pippin-tart

Design for the lid of a dish of pippins from The Accomplisht Cook by Robert May (1671) [Public Domain].

I used the same pastry for the lid of the tart, and used a selection of small cutters to make a decorative top. For the style of decoration, I drew inspiration from Robert May’s ‘Dish of Pippins’.[4] If you want to see some truly beautiful tarts in this style, have a look at Ivan Day’s cut-laid tarts. He often does them in puff pastry and cooks them separately, which would make a lovely addition to this tart. However you want to do it, this tart makes a lovely addition to any Christmas table!

[1] Anonymous, “Pharmaceutical and Cookery Recipes.”

[2] Tobey, “A Christmas Damson Plum Tart Recipe.”

[3] Macdonell, The Closet of Sir Kenelm Digby Knight Opened, 216.

[4] May, The Accomplisht Cook, Or, The Art and Mystery of Cookery., 243–244.

 unbaked-pie

The Redaction

Christmas Plum Tart


For the plums:

900g Plums

300g Sugar

315ml Water
For the Pastry:

70g butter

300ml cold water

290g plain flour

Eggwash or milk

To make the preserves

  1. Place the sugar and water into a large saucepan and heat bring to the boil.
  2. Use the tip of a sharp knife to slit the skin of each plum vertically around the circumference, following the dent in the plum. Place the plums in the syrup, reduce the heat and simmer for two hours. Allow the plums to cool, move them into a bowl with the syrup and place the bowl in the refrigerator overnight.
  3. The next day, return the plums to the saucepan and simmer for an hour and 45 minutes. Turn the heat up and boil for a final 15 minutes. Sterilise a jar and fill the warm jar with the hot plums.


To make the tart

  1. Preheat the oven to 170˚C. Place the butter and the water into a saucepan over medium heat, until the butter is melted.
  2. Place the flour into a bowl and spoon in the melted butter from the top of the saucepan. Add enough of the water from beneath the butter to make a pliable pastry.
  3. On a floured board, roll out the pastry while still warm. Lightly grease a 24cm tart tin, and line it with pastry. Roll out the excess again, and cut a circle for the lid. Decorate the lid as desired with a sharp knife or biscuit cutters.
  4. Fill the tart base with the preserved plums. Lay the lid on top and brush the pastry with eggwash or milk. Bake for 40 minutes or until lightly browned. Serve warm or cold.

baked-pie

The Round-Up

The Recipe: A reciept for damsons to bake at Christmastide or anie other type of plum from Folger MS.V.a 21 Pharmaceutical and Cookery Recipes (original images available on the Folger website, transcription available on the Shakespeare’s World blog)

The Date: c. 1675

How did you make it? See above.

Time to complete?: 4 hours boiling plums, plus an hour for the tart and overnight resting

How successful was it?:  The filling is very sweet, and I was glad that I didn’t add any extra sugar to the tart. I was worried that the filling was too liquid but it ended up being fine and was delicious, particularly when served warm.

How accurate?: I didn’t use damsons and I didn’t add any extra sugar, it was already very sweet. I didn’t keep the preserves for very long, and I would be interested to see how they would last given that they aren’t sterilised in a hot water bath, as most modern preserves are. I’m not sure how accurate the use of the pie tin is, but it certainly worked well. It might be more accurate to use a shortcrust or puff pastry lid, and certainly the decoration was only roughly inspired by the May’s cookbook.

References

Anonymous. “Pharmaceutical and Cookery Recipes.” Manuscript, c 1675. MS V.a.21. Folger Shakespeare Library.

Macdonell, Anne, ed. The Closet of Sir Kenelm Digby Knight Opened. London: Philip Lee Warner, 1910.

May, Robert. The Accomplisht Cook, Or, The Art and Mystery of Cookery. London: printed by R.W. for Nath: Brooke, 1671.

Tobey, Elizabeth. “A Christmas Damson Plum Tart Recipe.” Shakespeare’s World, December 24, 2015. https://blog.shakespearesworld.org/2015/12/24/a-christmas-damson-plum-tart-recipe/.

17th Century Polish Cuisine with Compendium Ferculorum

Pear.JPG

It has been such a long time since I have posted on here! But, my thesis is now complete and I actually have some time to cook and write. As a side note, I’ve been writing about some of the results of my research over at the Cook and the Curator blog. The first installment, about recreating the 19th century bread is up now, and the soup/meat recipes will be coming soon.


The recipe I made this week is also tangentially related to my studies. One of my lecturers heard about the blog and lent me a book that she had picked up in Poland. It’s a copy of Compendium Ferculorum by the chef Stanislav Czerniecki and originally published in 1682.[1]


In some ways the recipes are reminiscent of European medieval cuisines, with an emphasis on spices and sweet/savoury combinations. Pottages, sippets, blancmange and meat jellies feature heavily. There is also evidence for a complex network of international recipe exchange; the book includes dishes from Spain, France, England, Italy, Austria and Russia.

Pear Cake for Lent, Recipe from 1862

The Recipe

With more than 300 meat, fish and dairy recipes it was difficult to choose just one to start with. I’m suffering from an overabundance of pears at the moment though, so this seemed like a good excuse to make use of them. That led me to the recipe for Pear Cake for Lent. It’s an adaptation of the previous recipe, Apple Cake for Lent:


“Apple Cake for Lent: Prepare your dough as described above, cut peeled apples in three, coat them in your dough and fry in hot olive oil or oil. Being fried, serve forth sprinkled with sugar.

You will fry Lenten pear cake in a likewise fashion.”[2]


It’s not entirely clear which recipe for dough is being referred to here, but the previous recipe for Fig Cake says “Having kneaded the flour with water and yeast in a likewise fashion”,[3] and the Raisin Cakes for Lent before that says “Mix wheat flour with water and yeast and when it looks well risen, add saffron …”.[4]


Now, when recreating this there are two ways that I think you could interpret it. Some people online have claimed that modern Polish racuchy or racuszki are related to this recipe. Racuchy are a kind of apple fritter, with slices or chopped apple coated in a wet batter and fried.


However, the recipe seems to me to be a bit different (assuming of course that the translation is good). Firstly, the recipe clearly says to knead the dough, which is not something that you would do with a batter. Secondly, the instruction is to cut the apples or pears in three which would make very large fritters.


Instead, the recipe to me seems closer to Russian piroshki or pirojki which are a kind of doughnuts made with yeasted dough around a sweet or savoury filling. To that end I adapted a dough recipe from Natasha’s Kitchen, but used only flour, water and yeast as in the recipe. Salt is not mentioned in the recipe, but it really is required to stop your doughnuts tasting very bland. You could also add a pinch of saffron, dissolved in a little of the warm water, which would add a nice flavour and colour.

[1] Czerniecki, Compendium Ferculorum or Collection of Dishes.

[2] Ibid., 157.

[3] Ibid.

[4] Ibid., 156.

hand.JPG

The Redaction


Pear Cake for Lent


4 1/2 cups flour

1 3/4 cups warm water

1 tbsp dried yeast

1 tsp Salt

4 pears

Oil, to fry

Sugar, to serve


  1. Make the dough by mixing half a cup of warm water with the yeast and leave for 15 minutes until frothy. In a large bowl, place the flour and salt.
  2. Make a well in the middle and add the yeast mixture. Add the remaining water and mix together. You may need to add a little extra water to make the dough come together.
  3. Once the dough has come together, knead for 5-10 minutes until smooth and pliable. Place in a greased bowl, cover with a clean tea towel and allow to rise for 25 minutes. Knock down the dough, form it into a nice ball and return to the bowl. Cover with a tea towel and allow to rise for another 30 minutes.
  4. Place about 1/2 an inch of oil in a frying pan and heat over a medium temperature. Peel the pears then cut each vertically into thirds and remove the cores.
  5. Take a small handful of dough and make it into a ball. Stretch and flatten the ball evenly until it is a bit larger than the palm of your hand. Place a third of a pear in the middle and ease the dough around it. Pinch the dough together to seal the pear inside, then flatten the seam. Repeat until all the dough is used.
  6. Carefully drop a little piece of dough into the oil. If the oil sizzles and bubbles around it then it is hot enough. Use a slotted spoon to carefully place the cakes in the hot oil in batches. The oil should come about halfway up the sides of the cakes.
  7. After about a minute, turn the cakes over (this prevents them from rising unevenly on one side) and allow to cook until golden. Then turn them over again and cook until the other side is golden.
  8. Remove the cakes using a slotted spoon and drain on kitchen towel. Serve hot, sprinkled with sugar.

With pear.JPG

The Round-Up

The Recipe: Pear Cake For Lent

The Date: 1682

How did you make it? See above.

Time to complete?: 1.5 hrs.

How successful was it?:  Tasty, and I was really glad that the dough was cooked all the way through. The pear was lovely and sweet without any added sugar, but the dough needed some salt. They would be particularly nice with a little spice in the dough, and if I was doing it again I would add the saffron.

How accurate?: I still think that this thicker, bread-like dough is the way to go, rather than a batter. The original recipe doesn’t include any salt and I did make it that way but it really needs it. Presumably it’s just assumed that you will add it. The other big question that I had was what type of oil to use. Normally I wouldn’t use olive oil for frying, but I gave it a go since that’s what the recipe said (again, assuming that the translation is accurate). The flavour of the oil wasn’t a problem on the day that they were made, but two days later there was a definite gasoline flavour coming through. Since they really should be eaten straight away it’s less of an issue, but it might be worth using a flavourless oil, particularly if you are planning on keeping them for a bit.


References

Czerniecki, Stanislaw. Compendium Ferculorum or Collection of Dishes. Edited by Jaroslaw Dumanowski. Translated by Angieszka Czuchra and Maciej Czuchra. Monumenta Poloniae Culinaria. Warszawa: Wilanow Palace Museum, 2010.